
Hey Gingerbread People ( Yes I am doing the themed greeting again 🎄)
Its AGirlNamedEgypt and I finally have this post up, I have been SOO busy and had such a hectic last two weeks but FINALLY I fully edited this up and now back to the post 😅
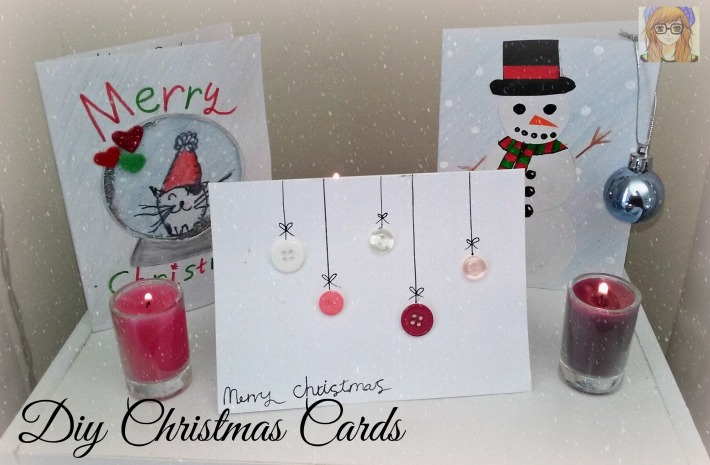
Every year around the start of December I start making my Christmas cards to send to my family and friends.
I love making cards and I think it gives a nice personal touch especially for family and friends that live too far away to give a present because it shows that you actually spent time on making them something and you put a lot of love and effort in to it 💞.
I usually make different looking cards each year so for today’s post I’m going to be showing you how to make the 3 different cards that I made for Christmas this year 👍.
What You Will Need
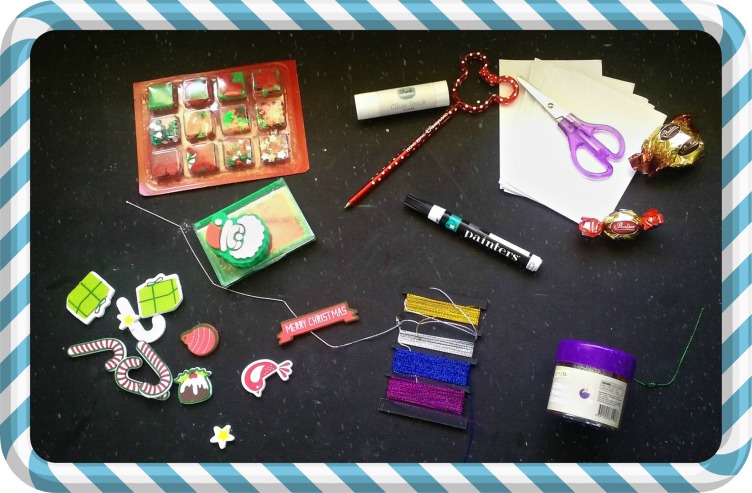
- Blank Cards
- Scissors
- Glue Stick
- Pen, Pencil, Vivid Pen
- Glitter
- String
- Stickers
- Stamps
- Craft Knives or Exacto Knife
- White Paint
- Plastic like the plastic from these
- Optional Chocolate for card maker 🍫🍬;)
- Other festive bits and pieces
- Circle Template ( I got mine here )
There are also a couple more household items you may need that I will mention when needed but I forgot to include them in the picture 😅 lol
Button Card
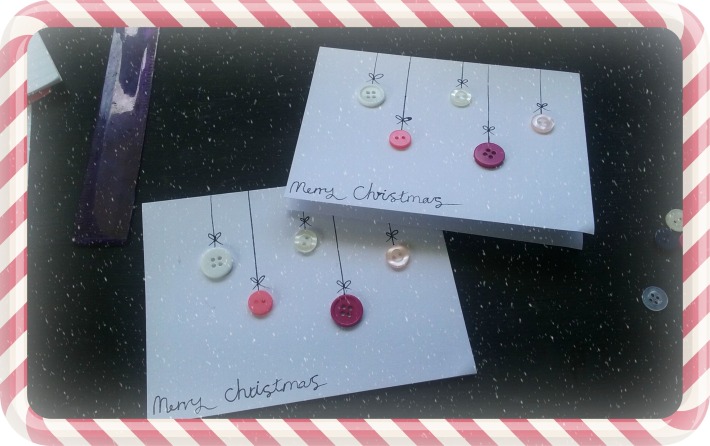
This card design is really cute and super simple as it only took me 5 minutes to assemble 😀
Start off with your blank card(s) and grab 5 buttons per card ( They can be any size, colour or shape, You can even customize it to your receivers favourite colours)
Then arrange your buttons like above, A tip I used was when I was happy with my designs i dotted a small dot through one of the button holes with a pencil so that I knew exactly where they went when i had to life them off to apply glue.
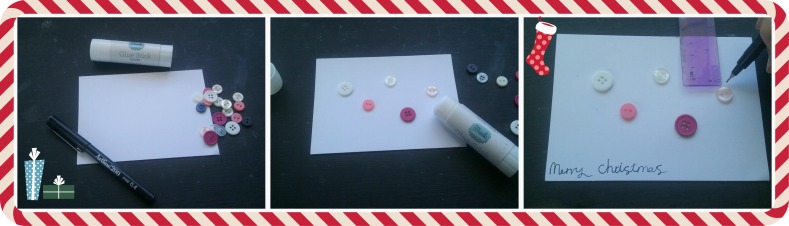
Now glue the buttons down and wait for them to dry, While they are drying add Merry Christmas in the bottom corner in your “fanciest” writing.
Once dried add little strings going up the card from the baubles ( Another tip I used was placing a ruler in the middle of the button the drawing one line up the card like that for a straight line) and a little bow for extra “Pazaz”👐👐👐👐.
All Done 🙂
Mr. ( Or Mrs. ) Snowman Cards
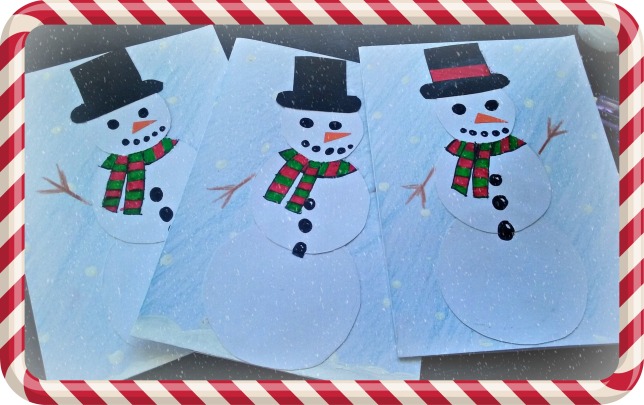
I love this card design and I’m giving these cards to all my little cousins because its soo cute
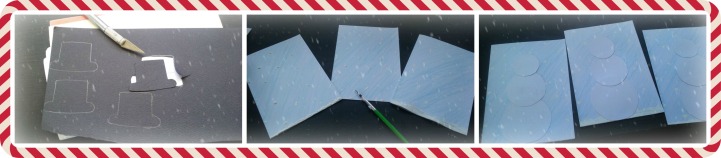
Start off with shading your blank cards light blue as it helps separate the white snowman from the background, I also added some snow drops with white paint and a small paint brush.
While your cards are drying cut out your snowman circles out of some white card ( Link for the template I used in the Things You Will Need list, I used 2.5 for the bottom , 2 for the middle and 1.5 for the head ).
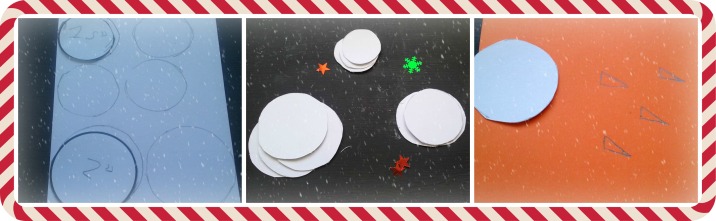
Next cut out some small triangles from orange paper, Top hats from Black Card and a strip of red for his Hat ribbon.
Now for assembly, First glue your biggest circle at the bottom ( I cut one side of this circle straight so it lined up with the bottom edge of the card ), Then glue on the middle, The Top and The top hat and the red strip of paper to the middle of the hat for its sash.
Now you can accessorize, Add two medium black dots for eyes, some small ones for the mouth and Three larger ones for his buttons on his belly using a black pen or black paint, ( Tip : I left a small dot in each button white for a “shiny” effect)
Add on his carrot nose and using a brown pencil draw on two arms.
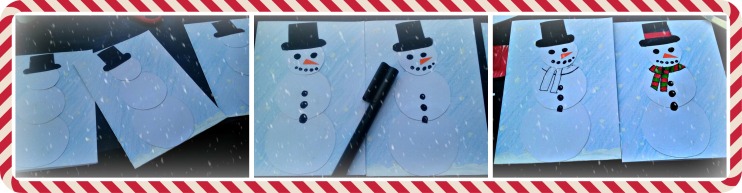
Lastly draw him a scarf, You can make this any colour but I chose classic red and green :-).
Tada now we have Mr. or Mrs. Snowman
Snowglobe Card
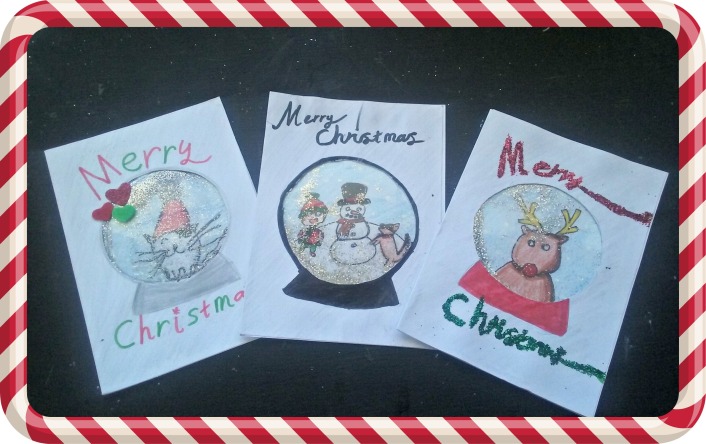
This is my favourite design but also quite detailed so I hope I can explain it properly.
Again you can gently shade your card any colour to really make the card pop, I choose silvers and golds.
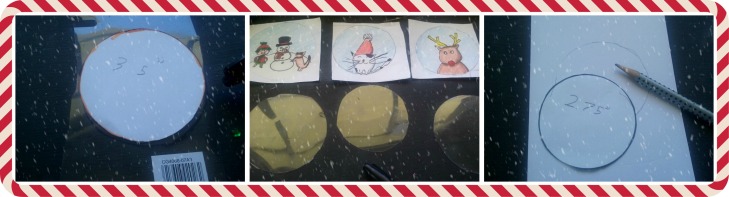
I used the same circle template from above and drew out some little festive scenes that would fit into a 3. circle or you can use a picture you like but make sure when you cut it out to cut it out like a square if I don’t make sense the pictures should explain lol.
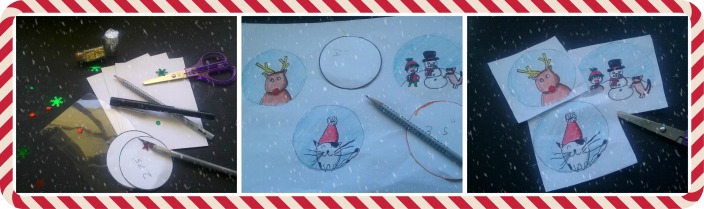
Now take a circle that is just smaller than your picture or drawing or just trim and trace it onto the middle of the front of your card then using an excato knife cut out the circle, Make sure to open your card and place it onto a board or something so you do not cut through the other side of the card or anything else 😋.
Next cut out a piece of plastic just larger than your drawing or picture this will act as the glass of the globe, Now add some glitter or any other shakable things ( I used Silver and Gold Glitter ) onto your picture and then add your plastic on top, Make sure there is still an air bubble so that you can still move around the glitter when you shake it and cellotape the entire edge of your drawing, But place the cellotape on the edge so you cant see it when you place the snowglobe into the circle of the card .
Now place the snowglobe picture onto the back of the front of the card ( I hope I make sense 😅😂 lol ), And it should be bigger then the circle we cut out of the front of the card and cellotape it down.
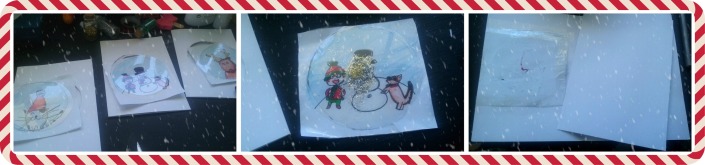
If you want a clean finish, Cut out a square of white card the same size as the card and glue it onto the back of the front of the card BUT make sure to fully cellotape the back of your drawing / painting or the glue will seep through and make a mess.
Leave your card to dry then flip it over the front and make the little “stand” of the snowglobe on the bottom of your circle like pictured.
You can now add Merry Christmas anywhere you want and Now all you have to do is include a festive message inside and all of your cards are done 😆.
I hope you enjoyed and I explained it properly ( But if not the pictures are pretty descriptive )
Also these cards are completely customisable and I’d love to see your designs or recreations so please send me a picture via my social medias ( Email form in my about page ) or use #agirlnamedegyptwhanau on twitter or instagram.
Till Next Time AGirlNamedEgypt xxx

Hi Egypt, very nice cards. I really like the buttons card. I can’t wait to see more of your craftiness. 🙂
LikeLiked by 1 person
Aww, Thank you 😄 Xx
LikeLiked by 1 person
🙂
LikeLike
Loved everyone of them! 😉
LikeLiked by 1 person
Thank you 😊 Xx
LikeLiked by 1 person
Cute ideas I love making handmade cards, so much more personal
Carrieanne X
http://Www.beautiesunlocked.com
LikeLiked by 1 person
Thank you 😊 Xx
LikeLike
I was searching for new ideas of hand mad cards since day 1 of December too .. happy to find that post
I will totally try some of those cards … beautifull work keep it up 🙂
LikeLiked by 1 person
Aww, Well im happy to help 😄, If you can I’d love to see how they turn out Xx
LikeLiked by 1 person
Sure 😀
LikeLiked by 1 person
I absolutely love the button cards 🙂 They look so cute and stylish!! x
LikeLiked by 1 person
Thank you 😁, I love it too Xx
LikeLiked by 1 person