Hey Guys
Its AGirlNamedEgypt and like I have said in previous posts I have been trying to give my room a new Fresh, Pastel, Happy feel and while scrolling through my Pinterest as I do every couple of hours I came along a Pin for distressed Mason Jars and after searching my kitchen I found a couple of old Jars and “Boom” afternoon planned, So this Is my Method / Tutorial for distressed Jars.
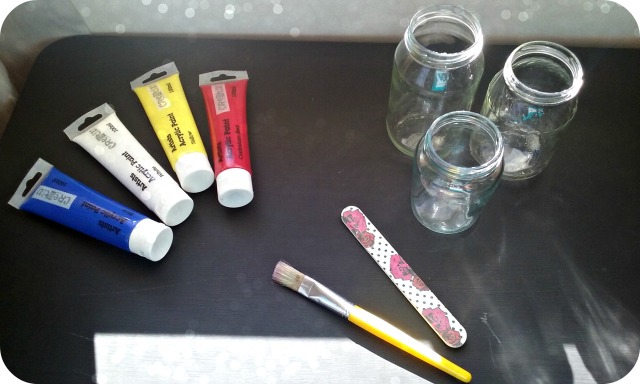
What you will need
- Clean, Dry Jars
- Acrylic Paint ( I got these for $6.99 at Whitcoulls but you can find acrylic paint at most craft shops )
- Nail File or Sand Paper ( I prefer using a Nail File as you can get into the detailed parts better )
- Paint Brush
- Cardboard or something just to place the jars on while drying
Mix Up Your Colours
Start off by getting your colours ready.
Tip : I used the metal holders of those little Tea light candles as they are really good for separating colours 🙂
I went for Pastel Pink, Blue and Mint but you can use any colours 😉
Tip : If you are mixing pastels use the slightest dot of the main colour then heaps of white as the first time I made the pink I used quite a lot of red and it took so much white to make it remotely pastel so I had to start over 😉 so be warned.
Painting & Drying
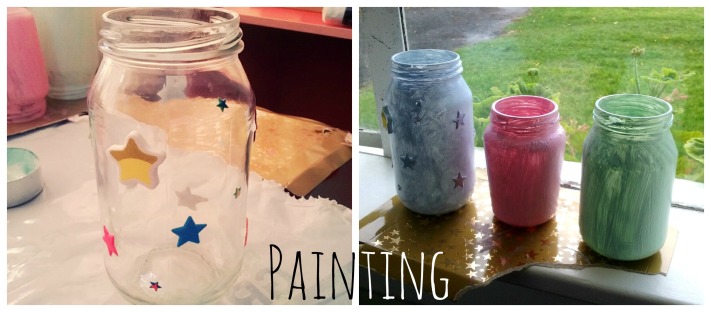
Now I would recommend doing 3 coats to get the most out of the colour as the first coat goes on sparingly.
With one of the Jars I added Star Stickers so I could paint over them and peel them off later.
The best way, I found was painting the neck of the jar first then flipping it over and painting the rest of the jar but remember to paint quickly and sparingly for the first coat.
Tip : I would advise you to place the jars where you want to dry them before painting as it is difficult to move the jars after painting 😉
It took about an hour or two for the first coat to dry and with the second coat you can paint it on thicker to cover up most of the missed spots from the first coat.
I left my second coat for about 3 hours then I painted the last coat on just to give it a finished look.
Tip : With acrylic paint the brush strokes will slightly show up but it helps with the Vintage look, If you wanted a modern / shiny look then you can spray paint the jars instead .
I left the third coat on overnight for optimum dryness ( Did that sound like a Diaper commercial or is it just me ? 😉
Finishing
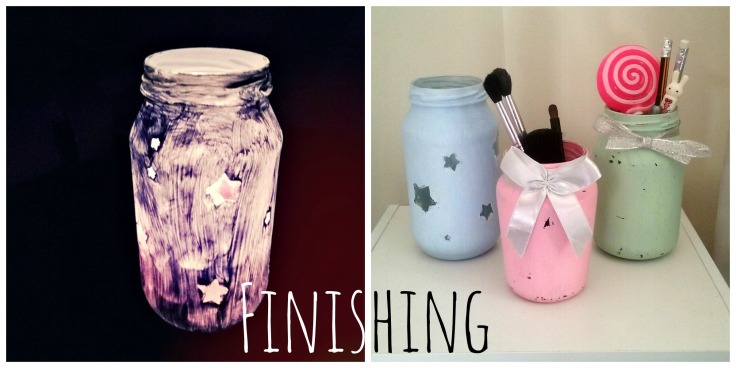
After completely drying I peeled off the stickers and blu-tacked a Tea light inside and Tada!, I really like this Night Light jar as the brush strokes light up too and it kinda reminds me of my favourite painting The Starry Night by Vincent Van Gogh 😉
With the other Jars I just filed them in random parts to reveal the glass to make it look vintage and well distressed and I tied a ribbon to the neck of the jar just to make it super cute.
Tada that was my tutorial thingy on Distressed Jars, I really love mine and am currently using them as a holder for my stationary on my desk and a Holder for my Make-Up brush 😉
Till Next Time AGirlNamedEgypt xx


Cool, ‘ll try that in my room as I am doing some adjustments to suit me so it looks like an older girls room, than the way I got it when I first left my parents room!!! Love your blog
LikeLiked by 1 person
Thank You 😄, I hope it turns out well X
LikeLiked by 1 person